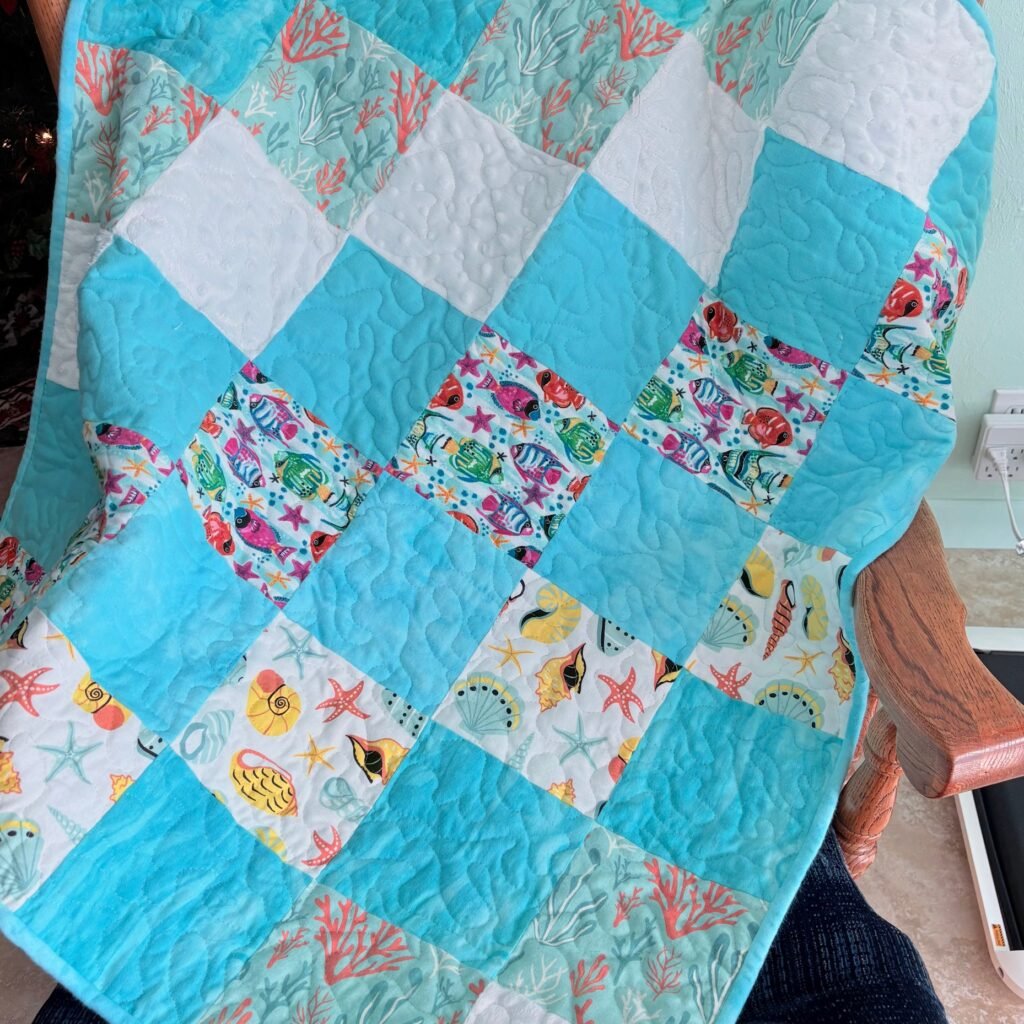
If you’re new to quilting and want to create something heartfelt, practical, and manageable, a baby quilt is the perfect place to start. A simple patchwork quilt made with squares is one of the easiest and most satisfying projects for beginner quilters. It teaches you the basics of cutting, piecing, pressing, layering, quilting, and binding—all without overwhelming complexity.
Why a Simple Squares Quilt?
The charm of this design lies in its simplicity. You’re only working with one shape—squares—so there’s no tricky piecing, curves, or angles to worry about. It’s also completely customizable. Want it brighter? Pick vibrant prints. Prefer a modern look? Go with solids and neutrals. You can use fabric you already have, or buy a charm pack (pre-cut 5” squares) to skip the cutting step altogether.
What You’ll Need
- Fabric: About 1 yard each of 3–5 coordinating cotton prints or one charm pack (40–42 squares)
- Batting: One crib-size piece (~45” x 60”)
- Backing: 1 yard of soft cotton or flannel
- Binding: 1/3 yard or pre-made bias binding
- Tools: Rotary cutter, ruler, cutting mat, sewing machine, thread, iron, and quilting pins or basting spray
Step-by-Step Instructions
1. Cut Your Squares
To begin, cut 5” x 5” squares from your chosen fabrics. For a crib-size quilt (approximately 30” x 35”), you’ll need about 42 squares (6 rows of 7). Of course, you can go larger or smaller depending on your preference.
2. Lay Out Your Design
Next, arrange your squares on a flat surface, mixing prints and colors to your liking. Take a picture to remember your layout!
3. Sew Rows Together

Now, using a ¼” seam allowance, sew squares together in horizontal rows to make the simple squares quilt. Press the seams—either open or to one side, just be consistent.
4. Join the Rows
Next, sew your rows together to form the full quilt top. Match your seams as you go for crisp corners, but don’t stress perfection—baby quilts are loved for their charm.
5. Make a Quilt Sandwich
Layer the quilt: backing fabric (wrong side up), batting, and quilt top (right side up). Smooth out any wrinkles and baste with safety pins or basting spray.
6. Quilt It
Use your sewing machine to quilt along the seams (called “stitching in the ditch”) or ¼” outside the seams for a clean, modern look. Straight-line quilting is simple and looks great!
7. Add the Binding
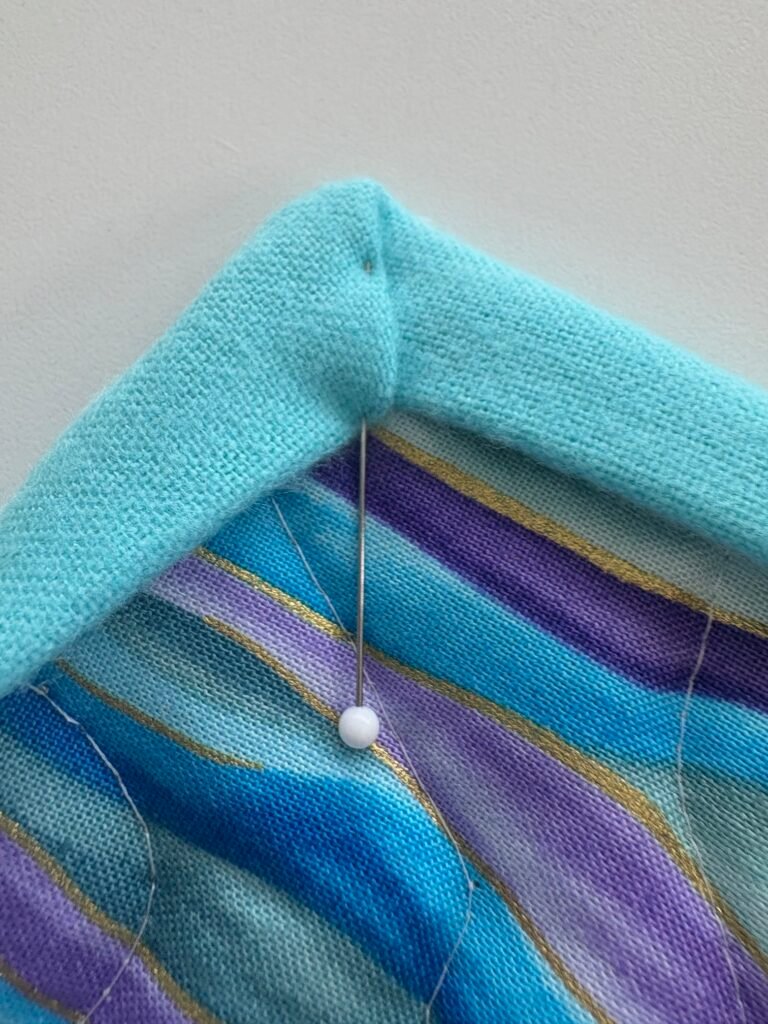
Attach your binding around the edges. You can machine-stitch it on or hand-finish it for a cleaner look.
Final Thoughts
This simple patchwork baby quilt is not just a sewing project—it’s a keepsake. Whether you are giving it as a gift or keeping it for your child, it is a special way to begin your quilting journey. And once you make one, you’ll be hooked!
Ready to get stitching? Let me know if you’d like a printable pattern or layout diagram to help you get started!