
Here are the 10 days of learning to quilt as I helped my granddaughter make her first baby quilt. Remember learning anything new takes time and patience .
Day 1 – Think back to the days of learning to drive. You just don’t jump into the driver’s seat and take off. Learning to drive is more than putting a car in gear and heading off down the road. There are rules of the road, parts of the car, and much more to learn one step at a time. Learning to be a good quilter is much the same, especially for anyone who never used a sewing machine before. Her first lesson involved a tour of the sewing machine. Parts of the machine, learning how to thread and fill bobbins, plus a small list “quilting must dos.” were on the initial day’s learn and practice list. For a little one this is even more important. A young one wants to jump right in and sew without the understanding that safety is truly the first step.
Day 2 – This young beginner must be taught. Included in this beginning lesson was how to knot the beginning and end of the seam so it does not unravel. Also, she needs to understand that seams need to be straight. A quarter inch seam is just that ¼ inch not more or less. These lessons, plus many others on how to quilt are basic skills of sewing. They will prove valuable in the years to come for the young quilter.
Day 3 – Once we decide on the basic quilt pattern and yardage, the next step is to go shopping for fabric. We chose multiple cottons that blend from one side of the color wheel and one color that crossed the wheel. We also need backing material and the batting. The next lesson involves how to cut the yardage into squares.
Day 4 – Safety on this step for the young quilter is important. Be sure to master the cutting wheel and rulers so that all pieces are cut perfectly square. The safety of handling a sharp cutting tool is part of this lesson. Each yardage of material slowly became a pile of 6 ½ x 6 ½ inch squares for the baby quilt.

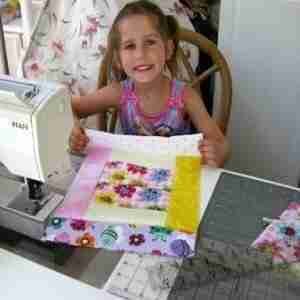
Day 5 – The young quilter places the 6-inch pieces on the design board to determine the pattern of the baby quilt. Though there were 6 different colors and patterns, the placement of the blocks can be a challenge. Once you position the blocks, stand back and squint to view the baby quilt design. Check for duplicate blocks in the same row or column.
Day 6 – Now the sewing begins for our new quilter. Each piece needed to be pinned starting from one end, then the other, and finally securing the center. Learning to place the pins so that the machine does not roll over them while securing the material in place is important. Taking time to pin and sew slowly helps to keep that ¼ inch seam allowance. Once you finish each row, sew the rows together to finish the baby quilt top.
Day 7 – For the young beginner quilter, there is great pride in that first quilt top. The next lesson is how to sandwich the quilt top, batting and backing to prepare for hand or machine quilting. Place the backing material either on the floor or large clean surface area with the right side down. Place the batting next and quilt on the top. Center these on the backing material and place into the quilting frame. The frame will hold the quilt while you pin and stretch it.

Day 8 – The young quilter needs to learn that there is more to quilting than just sewing the quilt top. Preparing the quilt on the frame is important. The backing should have no puckers, and it is always at right angles to the top. This guarantees that the two parts will stay aligned as the quilt is moved to continue pinning.
Day 9 – Once these three layers are inserted into the frame, use curved pins to secure the layers in place. Placing a pin about every 2 – 3 inches will be sufficient. Explain to our young beginner that it is easier not to try to close the pins while on the frame. Wait until you remove the quilt from the frame. At this point decide whether you will use hand or machine quilting to complete the layering.
Day 10 – Teaching our young quilter about how to bind the quilt is next. Once you are ready to sew the quilt binding, place the binding on your lap. Allowing the binding to hang off the edge of the sewing machine table may cause it to stretch. Explain to the beginning young quilter to be sure the binding strips are free of bumps and are not lumpy. Teach the quilter to sew the folded binding to the right side of the baby quilt, flip to the back of the quilt and hand sew with a blind stitch. The day finally arrives for my friend to enjoy her new baby quilt. Our young beginner has completed her first project.
Be sure to visit our Quilting Resource Center for more tips and information on learning to quilt.